Prefer watching videos? Head to the video version of this guide by clicking here >>.
Assembling Pallet Racking
Like almost anything you assemble, correctly assembling pallet racking is essential if you want it to work as intended. If you install your pallet racking incorrectly, there could be dangerous outcomes such as falling racking and damage to your products. The actual assembly of the racking is fairly simple, but the entire process from picking out racking to actually loading your inventory can take some time.
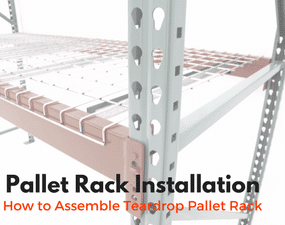
First, Make Sure You have the Right Pallet Rack Products
Before assembling your racking system, you’ll need to ensure you have the correct materials. First, you want to space out your warehouse to find what kind and how much racking you’ll need. For more on how to order pallet rack, head to this helpful article. If you’ve chosen selective teardrop racking, and want to learn step by step how to correctly install it, keep reading.
Important: How to Assemble and Install Pallet Rack Safely
The process that will be explained is the installation of a standalone bay of teardrop pallet rack. In our example, it will be demonstrated with two people installing the system. This is because, in practice, you always want to have at least two people installing the racking. It will help the installation go more smoothly and lower the risk of injury. To get your racking set up, you should have two frames and at least four cross beams. You may also have wire decks and pallet support bars, which come last in the installation process.
Before installation, we recommend marking where each beam will be slotted so there’s no need to worry about the beam being level. Let’s get started!
Step 1: Install the Bottom Rear Pallet Rack Beam
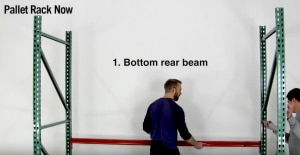
Once you have all of your measurements and parts ready, it’s time to begin the installation! To install a standalone bay of selective teardrop pallet rack, you will need your two frames, four beams, as well as wire decks or pallet supports on hand. One person should start by grabbing one of the upright frames and planting it roughly where it will stay once in use. The first beam to be installed will be the bottom rear beam.
The second person will grab the beam, while the first person assists by inserting the beam into the correct punch hole in frame. Then, while the second person is still holding the beam, the first person should insert the other side of the beam into the opposing upright frame. This is what step one should look like:
Step 2: Install the Top Rear Pallet Rack Beam
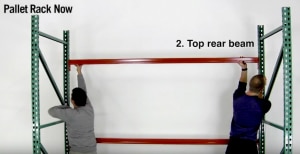
Once the first beam is fully inserted, both individuals can grab the second beam, which will be the top rear beam. This beam will be installed above the beam that was first installed. With beam levels previously determined, the individuals will know which holes the beam needs to be inserted to. Now that the bay can stand on its own, the two installers can install the top rear beam into the two frames together. Make sure the beam is tightly secured to each frame. This is what you should end up with:
Step 3: Install the Top Front Pallet Rack Beam
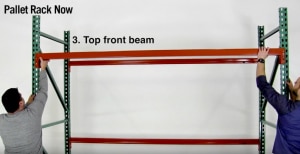
After the rear two beams have been successfully installed, it is time to install the front two beams. This process will be almost identical to the last, but with the top front beam being installed first. Both individuals should grab the next beam and insert it into the top front beam level. This should be at the same exact level as the top rear beam level. Again, on both sides ensure that the beam is fully inserted into both upright frames. Take a look what this should look like:
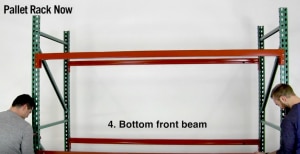
Step 4: Install the Bottom Front Pallet Rack Beam
Now you’re on to your fourth and final beam installation. This step will be similar to the previous steps. Have both individuals grab the last beam, and insert it into the bottom front section of the racking. This should be at the same beam level as the bottom rear beam. Have the individual on each side securely attach the beam to the corresponding upright frame. The finished product should look something like this:
Step 5. Wire Deck Installation
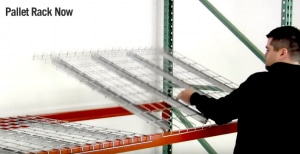
Now, you have installed your racking you just need to add your wire decking. You should have 4 wire decks that correctly fit into the size racking that you chose. Two wire decks will fit on each beam level. On two sides of the wire decks, there will be a small lip or overhang. These two areas will fit over the front and back beams. See one wire deck in place here:
Step 6. Begin Using Your Pallet Racking!
Place the remaining three wire decks the same way, and your selective teardrop pallet rack system is complete and ready to use!
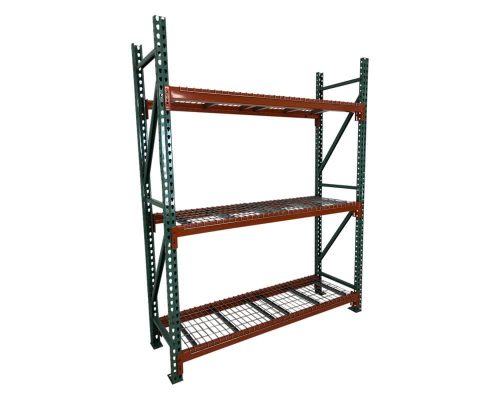
Although a standalone pallet rack bay only requires frames, beams and wire decking, there are many pallet rack accessories available. Some of these accessories include column protectors that protect your racking from forklift impact, row spacers to connect back-to-back racking, pallet support bars that take place of wire decks, and many more. But, one of the most important and simple accessories that every pallet rack system should have is safety clips. The most common, the Universal Safety Drop Pin can be installed in any pallet rack system. The purpose of this clip is to protect and keep your racking intact if a forklift were to hit the system.

